
Note: The following instructions are for Windows PCs and should be pretty consistent for both Windows XP, Windows 7 & Windows 8.
Your computer stores temporary files all over the place. Sometimes it is smart enough to clean up after itself – most of the time it’s not.
If you direct your main temporary directories to point to one location it will make it much easier to manage cleaning up these temporary files.
Anytime I setup a new computer (or help a friend), there are 3 main temporary directories which I re-point.
- C:\Windows\TEMP
- C:\Windows\TMP
- C:\Users\\AppData\Local\Microsoft\Windows\Temporary Internet Files where is your Windows log on username.
Before we begin, navigate to the folders above and delete as much out of them as Windows will allow (if there are any files it gives an error for, select the “Skip” option.
To re-point the following temporary directories:
- C:\Windows\TEMP
- C:\Windows\TMP
- On the start menu, open the Control Panel
- In the top right of the window, there is a drop down menu called “View By”. In the drop down, select either Large or Small Icons (depending on your viewing preferences)
- Select “System” from the list
- On the left hand side of the window, select “Advanced system settings”
- The window that opens should default to the “Advanced” tab. Click on the “Environment Variables” button at the bottom of the window
- There are two sections in the Environment Variables window. The first are variables that are unique to your user profile on your computer. The second are System variables which are global and apply to any profiles that are on your computer.
- In each section there should be two variables (so 4 in total): TEMP and TMP
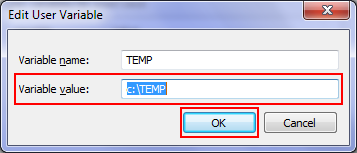
- For each variable, highlight it and click the “Edit” button
- In the pop up window, you want to type the folder location of where you want the variable to put it’s files. I like to have my TEMP files go into a TEMP directory right under my root (main) directory which is usually your “C” hard drive. So I type in “C:\TEMP”.
- For TMP Files, I create a second folder called “C:\TMP”.
The reason I like to keep them separate is that different programs use different folders and it can be easier to track down temporary files (if I need them) if I split up the files. - When you are done inputting the new variable values, click the “OK” button.
- When you have finished re-pointing all 4 of your TEMP & TMP variables to their new location, continue click “OK” buttons until all windows are closed.

![]()


Re-pointing the Internet Explorer temporary directory:
C:\Users\\AppData\Local\Microsoft\Windows\Temporary Internet Files where is your Windows logon username.
- Open Internet Explorer
- On the menu bar, select “Tools” and then “Internet Options”. Note: If you don’t see the menu bar, hit the “Alt” button on your keypad and you should see the menu bar appear.
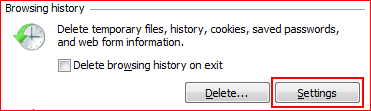
- In the Internet Options window, on the “General” tab, select the “Settings” button in the “Browsing history” section.
- The size of Internet Explorer’s cache – a browser cache is where a browser stores local copies of web pages and pieces of web pages (such as pictures, videos, etc.) which you view. It cache’s these pieces so that the next time you visit that web site it will load quicker. In general, you will not notice a big difference in performance so long as you have a relatively fast internet connection, regardless of how big you make your cache. Therefore, I usually set my browser caches (this works for any browser, Firefox, Chrome, etc.) to between 10 and 50 mega bytes (MB).
- The location of the folder where Internet Explorer stores this cache of temporary files.
- In the “Disk space to use” box, input size of cache – I typically put 10 – I don’t think you need more than 50.
- Click the “Move folder” button
- Browse to the location of your new C:\TEMP folder and select it
- Click “OK”
- Continue to click “OK” – Windows will inform you that it needs to log you off your profile in order to move the folder. Select “OK” and it will log you off. Log back into your profile and your Temporary Internet Files folder will be moved into your C:\TEMP folder.

There are two things to change here:


So now you have your main culprits of temporary files in one location on your hard drive.
You can either:
- Manually go into these folders on a regular basis (once a week is fine) and delete all files in these folders (note: Windows will not allow you to delete all the files each time – if it gives you an error on a file, just click the “Skip” button)
- Or you can set up a task and script to go and delete these files for you on a regular basis. I have a script that runs once a day to clean out my temporary files.
My next post will detail how to automate a deletion script.
